
Yamaha True Sound
As a former dealer of Yamaha Audio Equipment, I have some experience with setting up these lovely home audio systems and tweaking them here and there. Below you can find a generic setup which will be applicable to most of the Yamaha Natural Sound and Aventage Series

The easy way
There are always various ways to setup systems but they mostly boil down to two major selections.
The Easy Way
This is the method where most beginners will want to start. No fancy things, just simple and pure installation of your new Yamaha AV Receiver.
The easiest way to do this is to make use of the special App that Yamaha has designed. Read about it below and follow the link to get it.
Yamaha AV Receiver Setup Guide App
Yamaha Designed an AV SETUP GUIDE in an application that assists you with cable connections between AV receiver and source devices as well as AV receiver setup. This app guides you through the various settings such as speaker connections, TV and source device connections and assigning the power amp.
System illustrations and actual AV receiver images help you understand easily how to make the connections between devices. If your receiver is network capable, setting parameters on this app will automatically be copied to your AV receiver for simple setup.
Follow the link below the image to download the App and start installation the Easy way.


The Advanced Way
Here we start the more advanced way to setup your (new) Yamaha AV Receiver. This setup requires various steps that we will go through, with as an end result a perfectly setup system that will make you love your music, movies, TV shows and whatever you play even more. Let's get started !
The Basics
Let's start with the basics of a Surround Sound system, as you can see in the picture. It consists of various types of loudspeakers which, depending on their placement, have their own impact on the sound you experience.
With the basics we start with a common 5.1 Surround sound setup.
Speaker types :
FL : Front Left
FR: Front Right
C : Center
SL : Surround Left
SR : Surround Right
SW: Subwoofer
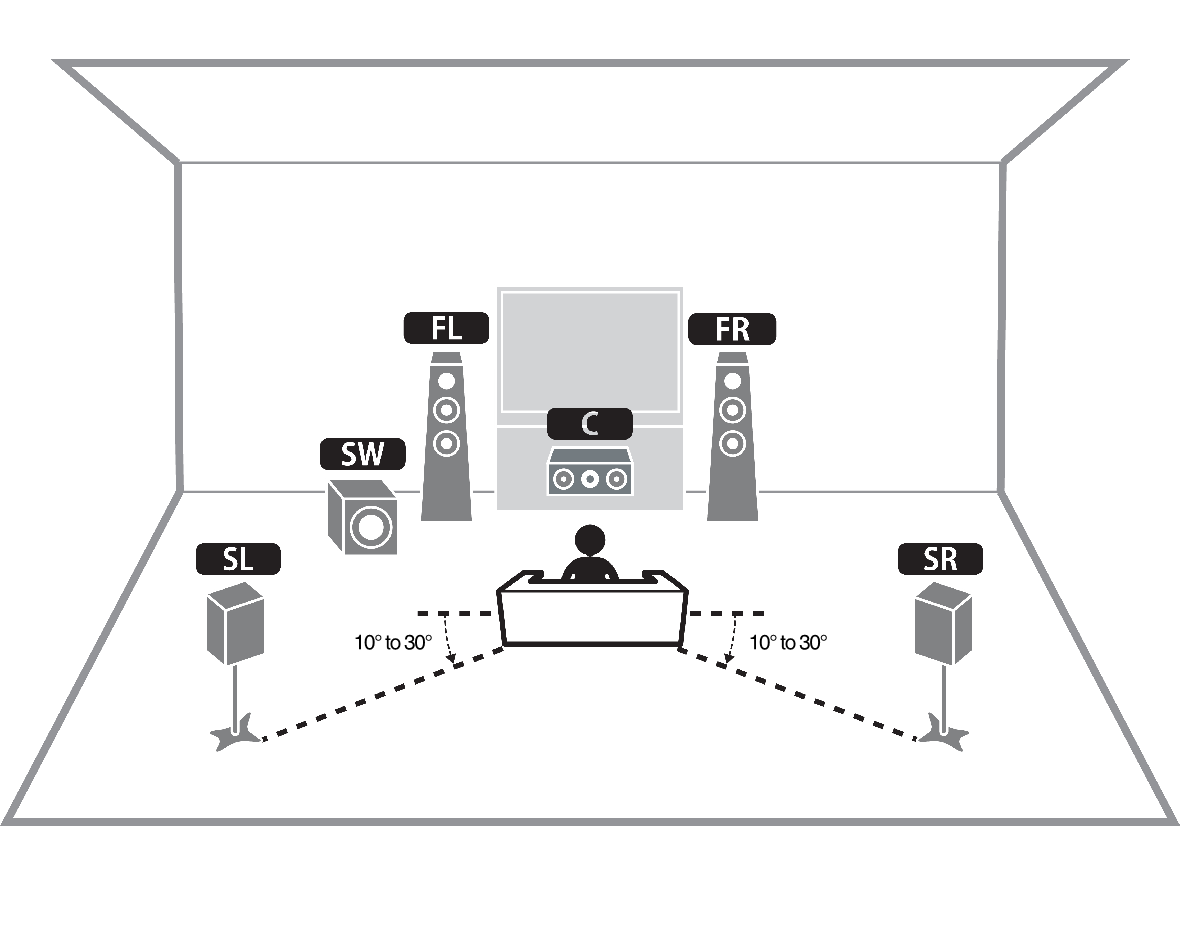
Home audio 5.1 generic setup
This basic setup is the basis for most surround sound situations. Only when you stream Atmos enabled movies you could experience the enhanced audio from 7.1 Atmos Audio. So let's first setup this 5.1 System.
Start with positioning the speakers along the lines as seen in the picture. it does not have to be exact as living rooms hardly ever have 1 chair in the middle of the room. You can also have your chair or couch alongside the back wall, which is more often the case. That's fine as well. So go move some furniture, set up the speakers and come back when you're ready for the next bit.
Where are you?
Your brand new AV receiver has a lot of skills but it doesn''t know where it is, where your speakers are or where you are. 😁
In many homes the couch / sofa is placed in sight lines of the TV system. As in the picture you see here. Depending on which position is your favorite place to sit, the audio signals may need to shift a bit to the left or right to reach your ears in a balanced way. So the system uses measurements to locate where you are. One of the most important settings is de distance from your location to your speakers.
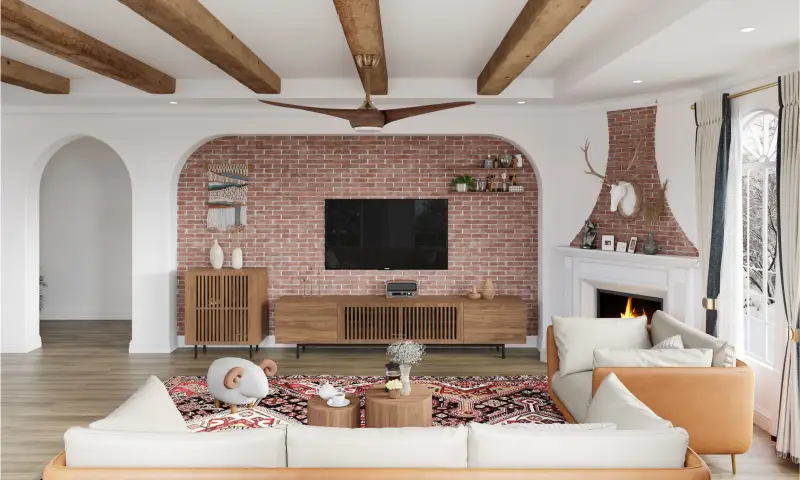
Home with a couch / sofa
Speaker types
Home Audio systems are often comprised out of a variating number and size of loudspeakers.
Generally there will be :
2 Floor standing Speakers ( LF + RF )
2 Small size surround speakers ( SL + SR )
1 Medium size Center ( C )
1 Medium size Subwoofer ( SW )
Your system will ask about these to know where to direct the bass as not all speakers have the same size woofer and some may not be able to reproduce low bass accordingly, such as some Center speakers and most Surround speakers. This is normal and is solved by setting the crossover levels for these speakers so the bass is handled properly by the subwoofer.

Klipsch Speaker system setup
Setting Crossover Thresholds
This is actually one of the easiest things to set but has a huge impact on the bass production of your set. As a rule of thumb you can best use this for a start.
Floorstanding speakers => 40 Hz
Center speakers or Bookshelves => 60 Hz
Surround speakers or Atmos speakers => 80 Hz
Please do not be tempted to use the infamous THX Standard as nothing you will ever play will let you experience this at home. The THX standard dictates that all Crossover levels should be set at 80 Hz. Which is nice in a cinema or other large facility, but not suitable for at home viewing.
Distance
Getting the proper distance to your speakers can be a tricky thing to work out. The simplest way is often the best way. For this it is best to be with two persons.
Person 1 : Sits down at the location from where the audio will be listened to the mostly. This person holds a tape measure of say 5 meter in his hand and a block-note to write down distances in meters from their position to the separate speakers :
FL = xx.xx meter
C =
FR =
SL =
SR =
SW =

Person 2 : Walks with the tip of the tape measure to the front of each speaker after which Person 1 notes the measured distance in meters.
Using YPAO
Some of you may want to use the Yamaha YPAO measurement. This is fine if you don't want accurate measurements but it will also change the tone of your output and will automatically adjust the speaker levels. This may give adverse results.
Speaker levels
Now we have the measurements for the distance, we can calculate the +dB or -dB levels for the speakers. The distances tell the AV Receiver the needed delay-times that it has to apply to the signal. This is calculated in milliseconds by the system itself, nothing to do for you here.
However, the volume of each speaker has to be set in accordance with the distance of the speaker. The further it is away from you, the louder it needs to be, and similarly, the closer it is to you, the less volume it needs. This is why most people's setup fails with their surround speakers, because they remain too loud over-shouting the front speakers and bringing an audio unbalance in the surround system setup .
Special dB Calculator
Sound Advice wouldn't be the best in Audio Service if we did not have an easy solution for you to learn what levels you need to set your speakers at. We have made a special calculator that will tell you exactly what you should set your Speaker Levels at based on the measurements you have taken.
How to use the calculator
Actually it is pretty simple. It looks just like the image on the right
1. Select the Speaker Setup ( 5.1 or 7.1 )
2. Enter all the measurements you have previously made.
3. Hit the calculate button.
4. Write down the values given and enter them in your system.
Done ! Now start listening en enjoy the music :)
This calculation does not take into account any room adjustments or reflections, it is purely based on the numbers and will give you an almost perfect basis for your settings, far better then any Microphone Setup system. Try it , it's free of charge. The calculator will open in a new window.
Finished !

This concludes our Setup Guide. you should now be enjoying a whole new level of sound, more vibrant, more placed and with a thick fat but not bulky bass throughout the room. If you come across anything that did not work, please contact us and we will help you solve it.
Add comment
Comments